Permissions
This area does not require a license for access.
Users can view reference data, while Super Users, Owners, and Internal Users can maintain and update it.
Edit Planogram
To edit a planogram, you can select "Edit Planogram" at the right-hand side of the planogram tab.
Setting The Planogram Layout Appearance
Within the planogram, you have three options with + and - icons:
Row: Use this option to add or remove rows in the planogram layout.
Column: Use this option to add or remove columns in the planogram layout.
Chute: Use this option to merge selections for larger items, such as when using a double spiral for vending. To merge two selection fields, select the left-hand side box and then click the + icon next to Chute.
Benefit: These options provide flexibility in designing and configuring the planogram to suit different machine layouts and product arrangements.


Adding Products to the Planogram Layout
To add products to the planogram:
Search for the Product: Enter the product name in the search bar.
Drag and Drop: Click and drag the product into any selection within the planogram. If the selection already contains a product, the new product will replace the existing one.
Product Name Display: When a product is added to a selection box, the Product Name will be displayed. If the selection box is empty, the field will remain blank.
Benefit: This process allows for easy and efficient updating of product placements in the planogram, ensuring accurate representation of the products in each selection.
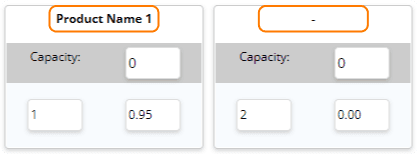
Once a product has been added to the selection:
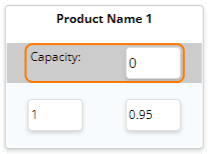
Enter Capacity: You can specify the Capacity of the product, which denotes the number of items that the selection can hold.
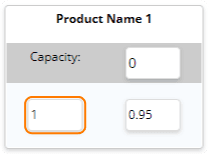
The Selection Number must match the selection position of the machine.
Note: This field should not be used for the product name. If you enter a product name here, sales will not be recorded correctly.
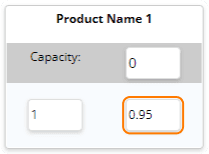
If needed, you can update the Retail Price of the product. By default, this price will be set to the Product Retail Price from the Product List in Administration.
To remove products from the planogram:
Click and Drag: Drag the product to the bin icon located on the right-hand side of the layout.
Quick Tip
If a machine has “Update Product Prices From Machine” set to Yes, you will not be able to amend the Retail Price manually, as it will be automatically updated based on the audit file.
Benefit: This setting ensures that product prices are consistently aligned with the latest data from the machine, maintaining accuracy and reducing manual adjustments.
Adding Custom Counters to the Planogram
To add Custom Counters to the planogram:
Search for the Custom Counter: Enter the Custom Counter Name in the search bar.
Drag and Drop: Click and drag the custom counter into any selection within the planogram. If the selection already contains an item, the new custom counter will replace the existing one.
Custom Counter Name Display: When a custom counter is added to a selection box, the Custom Counter Name will be displayed.
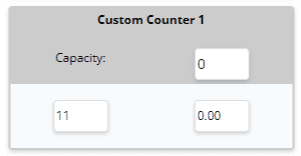
Quick Tip
Custom Counters are best positioned at the end of the planogram for optimal organisation. This placement ensures:
Clearer Visibility: It separates the products from custom counters, allowing a more organised view of both categories.
Stock Visit Sheets: Custom counters will not appear in the "Products" section of stock visit sheets, making it easier to focus on the product data during restocking.
Applying the Planogram
After amending the planogram, you can proceed by selecting the "Apply Now" dropdown. This provides options for applying your changes:
Apply Now: Immediately applies all changes made to the planogram, updating the machine with the new configuration.
This step ensures that any adjustments to product placement, prices, or custom counters are saved and reflected in the machine’s operation.

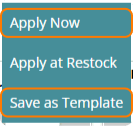
Save as Template: If you want to apply the same planogram to multiple machines, choose this option. You will need to enter a Template Name, and the planogram will be saved to the Planogram Template list within Administration. This allows you to easily assign the same planogram to other machines later.
Quick Tip
If the machine you're amending has a planogram template assigned, applying any changes will disconnect the machine from that template. However, this action will not impact the original planogram template itself, meaning the template remains unchanged and can still be used for other machines.
