What is the Estate Map?
The Estate Map offers a visual overview of machine locations and provides the ability to view an operator's scheduled route. This map helps in efficiently managing and planning service visits by highlighting machine positions and optimising routes for operators.
Permissions
This area requires a Planning or Finance license to access.
Users, Super Users, Owners and Internal Users can view the data within this area.
Quick Tip
To ensure that a machine appears on the estate map, you should:
Check Machine Setup: Verify that the machine has been correctly configured in Administration → Vending → Machines.
Verify ‘Date Live’: Ensure that the machine has a 'Date Live' assigned.
Confirm No ‘Date Lifted’: Make sure the machine does not have a 'Date Lifted' assigned.
Check Group Assignment: Ensure that the machine has a group assigned.
Validate Planogram Setup: Confirm that the planogram has been correctly set up for the machine.
Quick Tip
If machines are appearing in the ocean, it indicates that the site may not be correctly geolocated. To correct this:
1. Navigate to Administration → Vending → Sites.
2. Select Edit Site for the site in question.
3. Verify and update the geolocation details for the site to ensure accurate positioning on the map.
Machine Clusters and RAG Statuses
On the estate map:
Clusters: When multiple machines are located in the same area, they are displayed as a cluster. The cluster icon will contain a number indicating how many machines are grouped together. If there is no number in the cluster, it means there is only one machine in that location.
Health Scores: The map uses the thresholds set for each machine to calculate its health score. Machines are color-coded based on their health status:
Green: Healthy
Amber: Warning
Red: Critical
Black: Not operational or requires immediate attention
These colour codes are visually represented on the estate map to provide a quick overview of machine statuses.
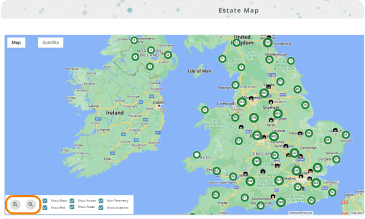
When you select a cluster on the estate map:
Cluster Card Panel: A card panel will appear on the left-hand side of the screen.
The panel lists all machines within the selected cluster by Machine Name.
The colour of the panel corresponds to the health score of the machines (e.g., green, amber, red, black).
You can select a machine name in the panel to view additional details about that specific machine.
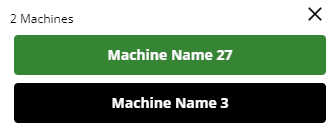
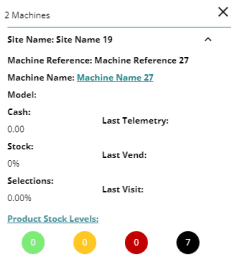
If a machine is displaying incorrectly on the estate map:
Search for the Machine: Locate the machine in question and go to the Machine Summary page.
Check Thresholds:
Navigate to the Thresholds section.
Verify that the correct Health Profile is set.
Ensure the operational thresholds are correctly configured.
Save any changes you make.
Note: There may be a slight delay before changes are reflected on the map. Additionally, non-telemetry machines will always display as a ‘green’ status regardless of their actual condition.
Filtering the Estate Map
On the right-hand side of the map, there is a date picker that allows you to:
View an Individual Day: This helps in examining the machine status and operator routes for a specific day.
View Scheduled Routes: It shows which operators have routes scheduled for the selected date.
You can adjust the date by either:
Selecting and Entering the Date: Type in the desired date directly.
Using the Arrows: Click the arrows on either side to navigate through dates.
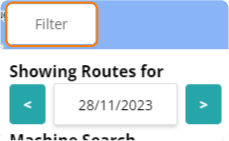
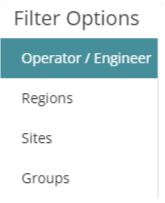
In each filter option, you can use the "Check All" option to select or deselect all items within your current view. Additionally, you can use the search function within each filter to narrow down the results and find specific items more easily.

Viewing Routes
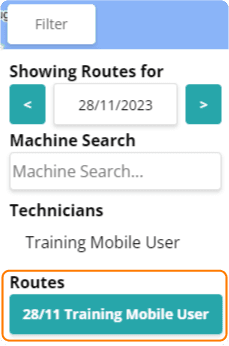
As you navigate through the dates, the Routes section at the bottom of the screen will update to display the routes scheduled for the selected date, along with the operator assigned to each route. To view the details of the route an operator is scheduled to visit, select the button associated with that route. This will open the route information for the chosen day.
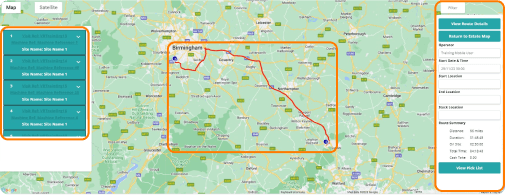
On the left-hand side of the map, you'll find the order of machines to be visited within the route. Each visit card includes a hyperlink to the Visit Ref, which you can select to view the visit sheet, and the Machine Ref, which links to that machine's information page.
Within the map, the scheduled route is displayed as a line:
A red line indicates that there is insufficient stock at the operator's location to complete the route.
A blue line shows that there is enough stock.
On the right-hand side of the route details, you can see:
The Operator scheduled for the route.
The Start Date and Time when the operator should begin the route.
Start and End Locations for the route, if specified.
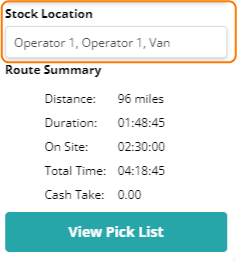
The Stock Location from which the stock is coming.
Quick Tip
In the left-hand panel, you can reorder uncompleted visits by dragging and dropping them into a different sequence. After rearranging the visits, click Save Changes to apply and save the new order.
Viewing Routes
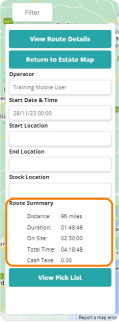
At the bottom of the right-hand panel, you will find the Route Summary, which includes:
Distance: The total distance the operator is expected to travel.
Travel Time: The total estimated time for traveling between locations.
Time on Site: The estimated time the operator will spend at each site.
This summary provides a comprehensive overview of the route's logistics.
After viewing or adjusting the route details:
Return to Estate Map: This option will take you back to the cluster map view where you can see the overall map with all machines and routes.
View Route Details: This option will navigate you to the route list with the currently scheduled route selected, allowing you to delve into more specific details about that route.
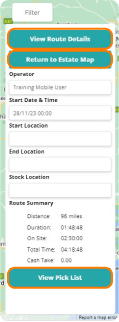
If you wish to see the stock required for the selected route, you can View Pick List which will take you to the picklist for that route.

